
How to Generate an API Token
Step 1: Access Developer Settings
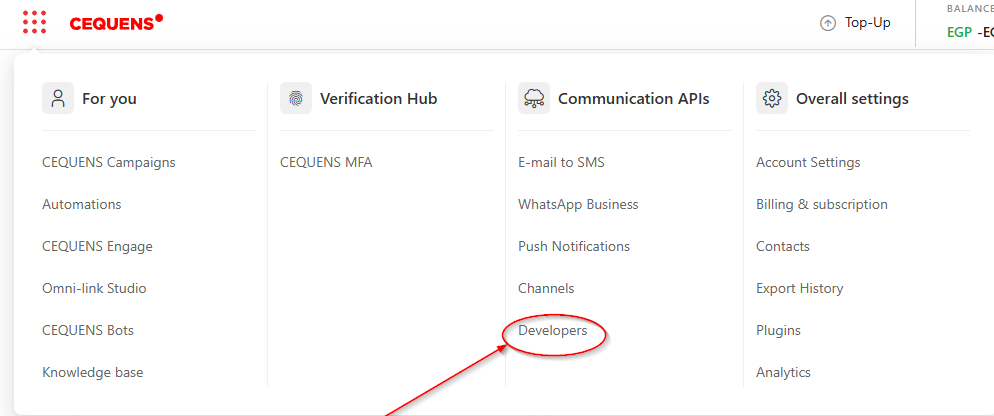
Open the main navigation menu in the Cequens dashboard.
Under the Communication APIs column, select the Developers option.
Step 2: Initiate API Key Creation
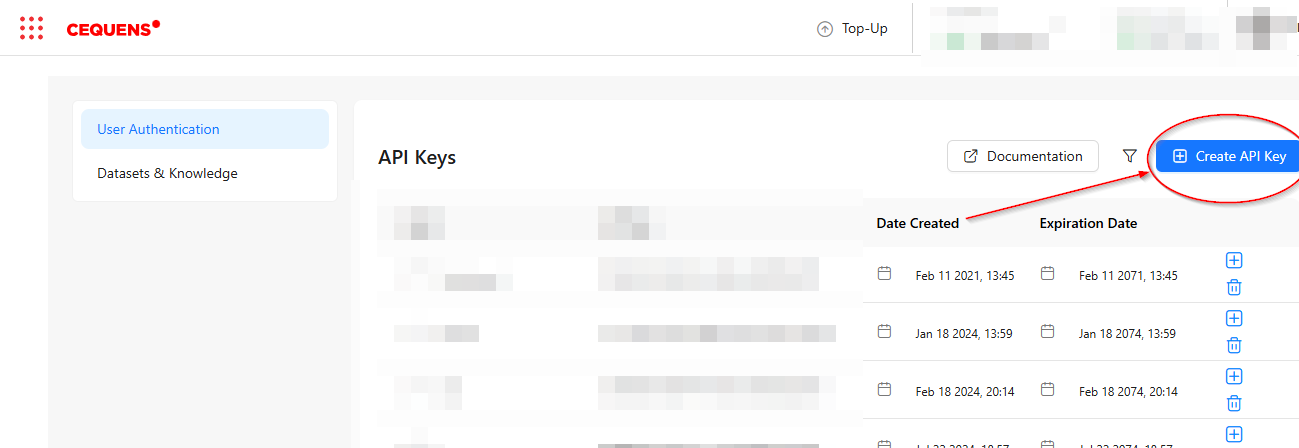
Navigate to the API Keys tab and click the blue + Create API Key button.
Step 3: Configure and Finalize
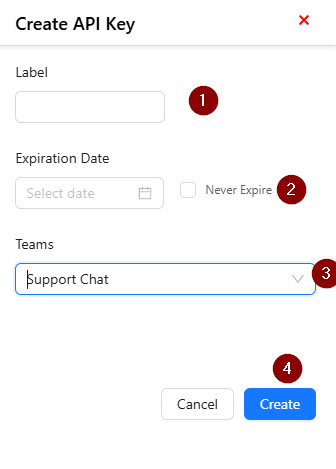
Label: Provide a name for the key.
Expiration: Set a date or select "Never Expire."
Team: Assign the key to the appropriate team and click Create.
Step 4: Extract and Secure Your Token
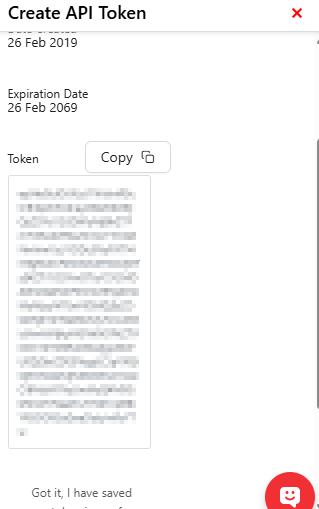
Once created, the system will display the unique Id, Label, and Expiration Date.
A long-string Token will be generated in the display box.
Action: Click the Copy button next to the token.
Part 2: Testing the API via Documentation
You can test the API directly using the Cequens Interactive Documentation. This allows you to verify your credentials and message formatting before writing any code.
Step 1: Authenticate the Request
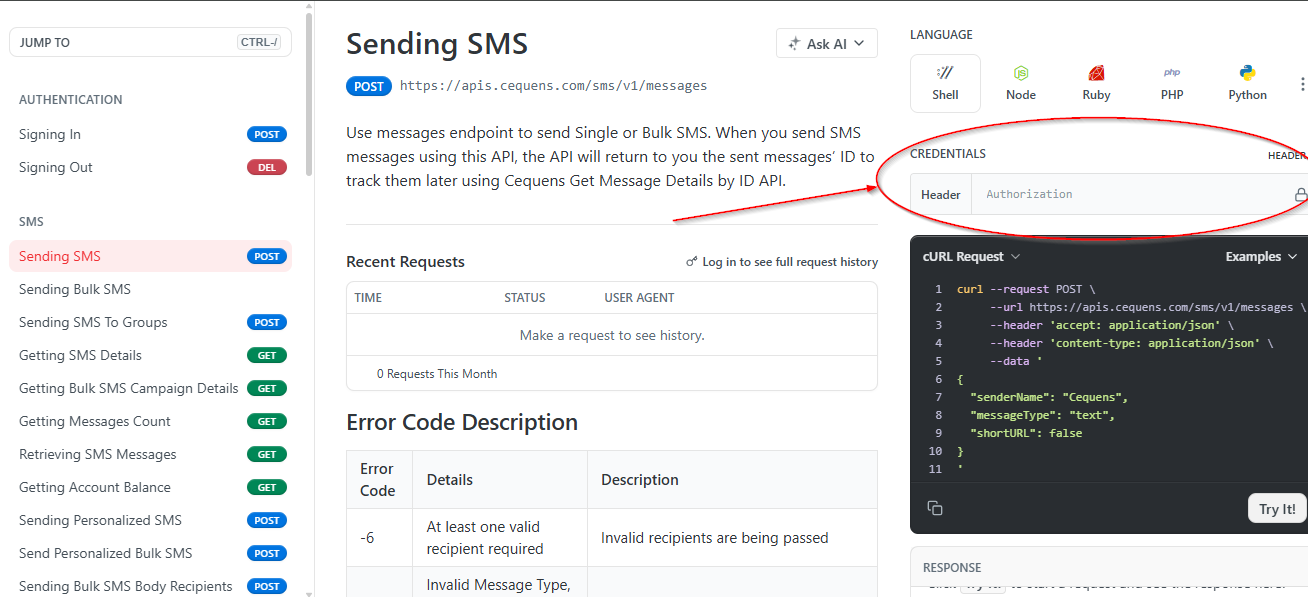
Locate the Authentication or Header section on the right side of the page.
Paste the API Token you saved earlier into the designated field.
Step 2: Define the Message Payload
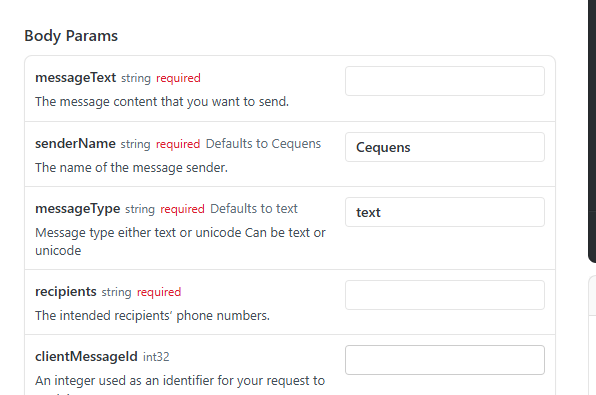
In the Body section, input your campaign details:
senderName: Your authorized Sender ID.
messageText: Your message content (e.g., "Test message from Cequens").
recipients: The target mobile number (e.g.,
96650XXXXXXX)
Step 3: Run the "Try It" Test
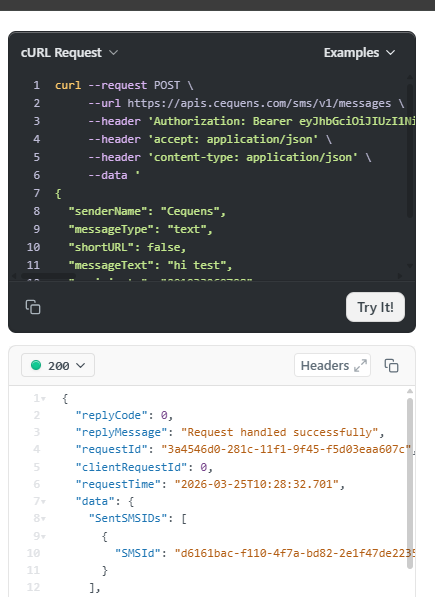
Click the "Try It!" button to send a live request.
Review the Response: The documentation will display a real-time response. A successful send will return a
200 OKstatus and a unique Message ID.
[IMPORTANT] Keep your token in a safe area: Immediately save the copied token in a secure location, such as a protected notepad, password manager, or secure documentation file. This token is essential for your integration and may not be fully visible again for security reasons.